
Thanksgiving is almost here, and it’s time for the honored tradition of making hand turkeys—but maybe parents should get their hands dirty, too.
Make your own hand turkey alongside your child to create a fun craft and a memory to look back on year after year and remember how tiny their hands were.
Here’s a step-by-step guide to making painted hand turkeys with your child.
You’ll Need:
- Washable, nontoxic paints (red, orange, yellow, brown, black)
- A small paint brush
- A cup of water
- Paper towels
- Paper plate or palette
- Googly eyes
- Glue
- Cardstock paper
- Markers
- Little hands
Step 1: Set Up
Place the cardstock paper flat on the table. Pour a small amount of each paint color on the paper plate or palette. Have the cup of water and paper towels nearby.

Step 2: Apply Paint
Apply the paint to your child’s hand first. Use brown paint on the palm and the rest of the colors on each finger. This step must be done quickly to avoid having the paint dry.
Tip: If you only have one paintbrush, rinse it and pat it dry on a paper towel before using the next color of paint.
Step 3: Place Hand on Paper
Press your child’s hand gently but firmly to the paper for a few seconds. Then, have your child remove their hand from the paper and use the paper towels for cleanup.
Step 4: Your Hand
While waiting for your child’s hand painting to dry, it’s time to take care of your own. Paint your non-dominant hand in the same way and make your print next to your child’s. Wait for the paint to dry before continuing.
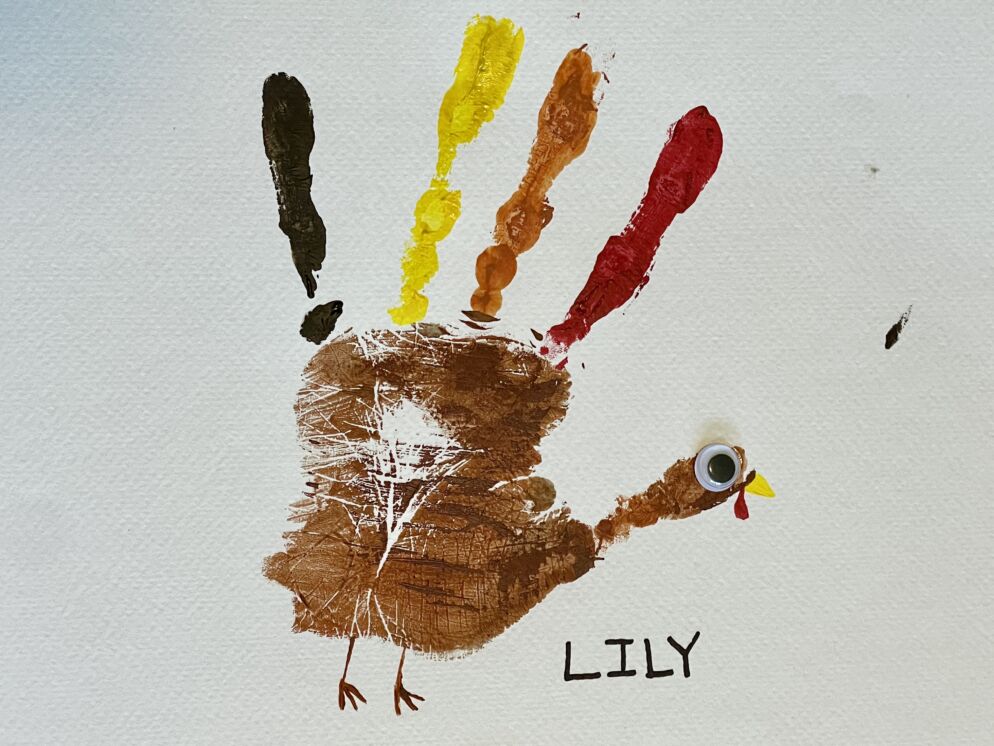
Step 5: Details
Use the tiny paintbrush and yellow paint to make a small triangle for the beak (as pictured). Add a little red teardrop beneath the beak. To create the feet, you can use a thin brown or black marker or try your hand at painting those little turkey legs.

Step 6: Place the Eye
Apply one small drop of glue to the back of a googly eye and stick it on the part of the thumb print where the head is. Do this for both turkeys. Wait for the glue to dry before moving your turkeys.
Step 7: Names
Write your name next to your hand turkey and have your child write their name next to their hand turkey. You can also add your ages next to the name to look back on when the child is older.


